19
Май
Frame by Frame Animation on Linux!
Автор на .
Today marks an important day in the life of OpenShot Video Editor... the day we became a serious video editor. I'm talking about frame by frame animation, composited on top of multiple layers of video and audio! You can now "easily" edit every single pixel of your video (if you so desire). As you can tell, I'm very excited about this feature.
To start with, we have 2 new menu options: Import Image Sequence and Convert to Image Sequence. Choose any video clip in your project, right click on the clip and select "Convert to Image Sequence", and it will create a folder with every single frame of that video clip (i.e. frame_0001.png, frame_0002.png, etc...).

Once you have an Image Sequence in your project, you can move it around as if it was a regular video clip, trim it, arrange it, and preview it. But most importantly, it maintains the alpha channel of the PNG images, so any transparency shows through to the next track (i.e. next layer of video). Here is an example, showing a sequence of transparent PNG images on top another video clip. The background video clip shows through the transparent areas of the image sequence.
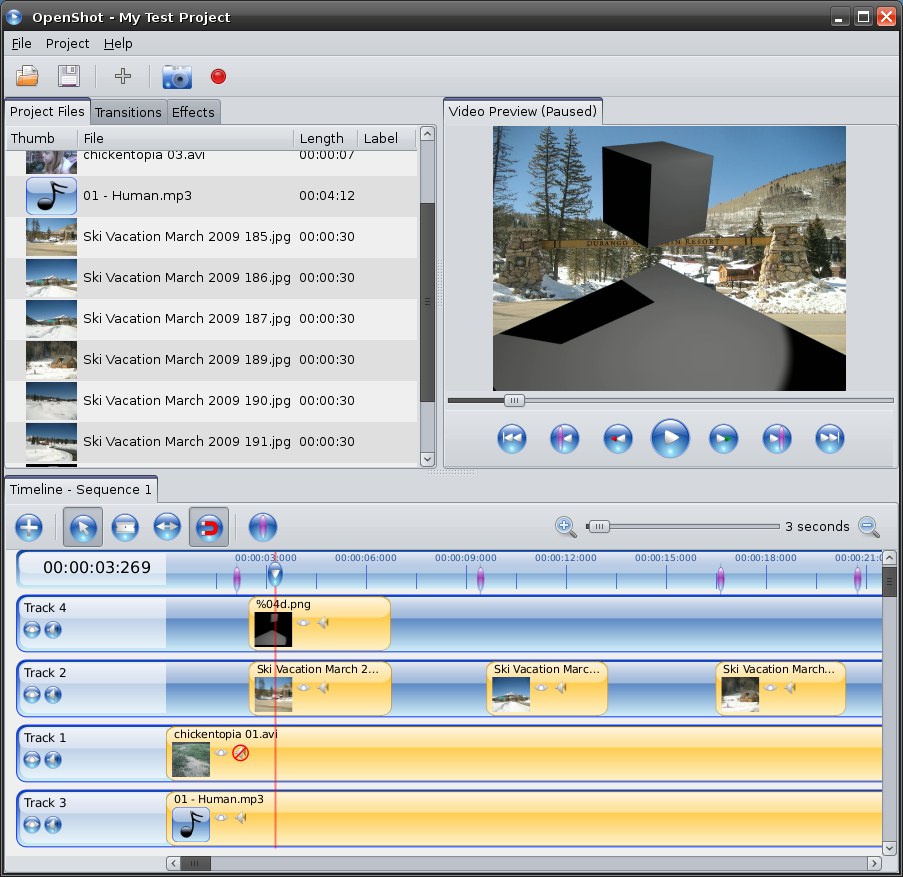
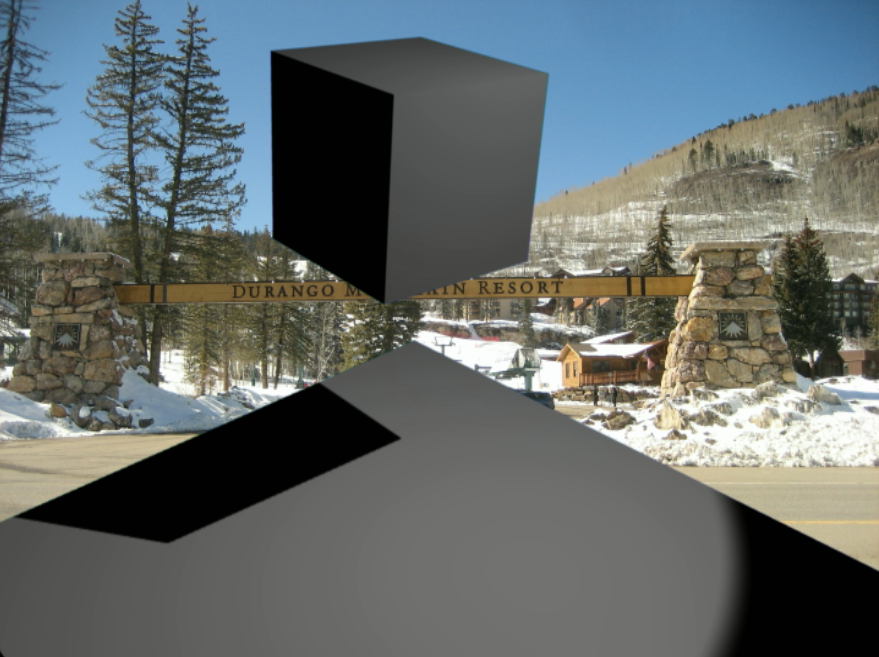
Here is a close-up of the composited image sequence and video clip. Notice how smoothly they are composited... no jaggies anywhere.
You can use your favorite photo editing program (in my case, Gimp with the optional Gimp Animation Package - GAP installed) to edit each frame of your video clip. GAP allows you to quickly save your changes and move to the next or previous image in the sequence. It even allows you to key frame and apply settings across many images at once.

In summary, these new features allow you to quickly convert video clips into images, enabling you to modify the images, and easily arrange them on your timeline with all your regular video and audio clips.
Once you combine OpenShot with other leading packages, such as Blender, Gimp, and Inkscape, this is becoming a great platform for video editing, compositing, and special effects.