Timeline
The timeline is where your video comes together. You arrange clips, trim them, layer visuals, and make timing decisions here. If you are new to editing, think of the timeline as a simple left-to-right story: earlier moments on the left, later moments on the right.
If you are just getting started, read Quick Tutorial first, then come back here for more detail. For a labeled breakdown of toolbar controls, see Timeline Toolbar.
Timeline Basics
These terms are used often in this guide:
Term |
Meaning |
|---|---|
Playhead |
The red line that shows your current time position. |
Track |
A horizontal layer that holds clips (top tracks appear above lower tracks). |
Clip |
A video, audio, or image item placed on a track. |
Transition |
A blend between two overlapping clips. |
Marker |
A saved point in time you can jump back to quickly. |
Keyframe |
A saved value at a point in time (used for animation). |
For a full glossary, see Glossary.
Common Timeline Tasks
Most editing sessions follow a similar flow:
Add media to the project using Import Files.
Drag files from the project panel onto timeline tracks.
Trim clip edges to remove extra content.
Move clips into order and stack tracks to build your scene.
Add transitions and effects where needed (Transitions, Effects).
Preview and adjust timing (Playback).
Clip trimming, slicing, and clip context menu actions are covered in detail in Clips.
Selecting Clips and Transitions
Selection is one of the most important timeline skills:
Click an item to select it.
Ctrl+Click adds or removes items from selection.
Shift+Click selects a range between your anchor item and the clicked item.
Ctrl+Shift+Click adds that range to your current selection.
Alt+Click ripple-selects from the clicked item to the end of the track.
Drag an empty-area selection box to select multiple items.
See Clips for the full list and examples.
Timeline Toolbar and Zoom
The timeline toolbar helps with common navigation and editing actions (snapping, retime, razor, markers, centering, and zoom).
Tip: If timeline editing feels crowded, zoom in with the timeline slider to make small clip adjustments easier.
You can also zoom the timeline with Ctrl+Scroll Wheel. On the QWidget timeline, hold Ctrl and drag with the middle mouse button for smooth zooming.
Tracks, Locking, and Inserting
Tracks help organize your edit. A common setup is:
Top tracks: titles, overlays, logos, picture-in-picture
Middle tracks: main video content
Lower tracks: music and sound effects
You can lock tracks to protect them from accidental edits and use insert/ripple editing when you need later clips to move automatically.
For track layout basics, see Tracks & Layers. For detailed clip editing behavior, see Trimming & Slicing.
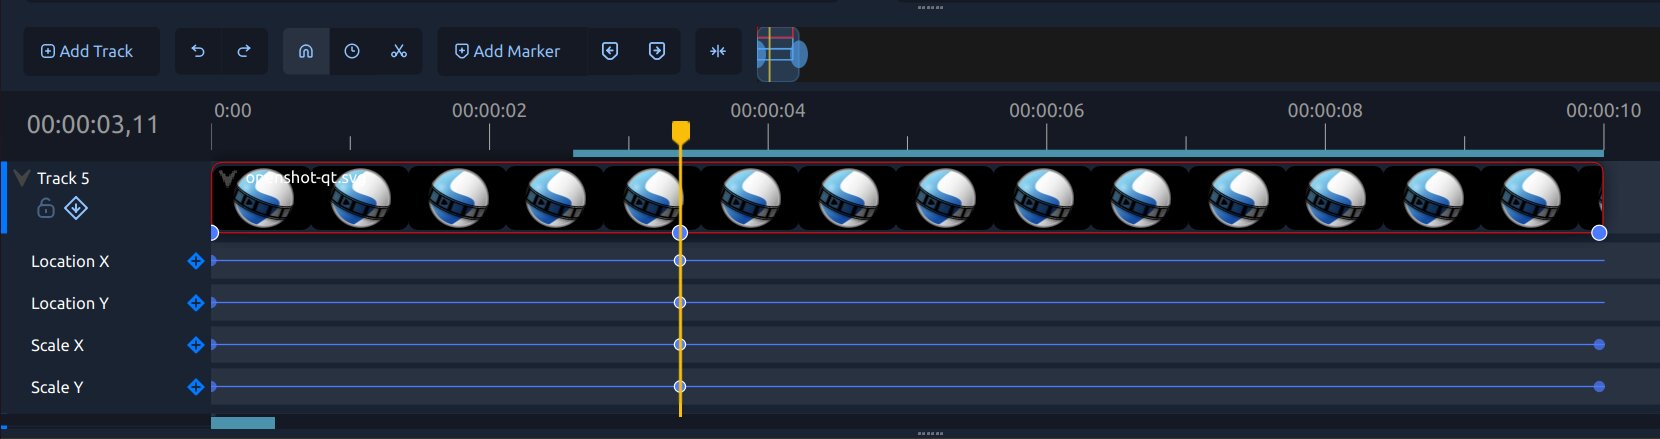
Keyframes in the Timeline
Keyframes let you change values over time, such as position, scale, rotation, opacity, and effect settings.
In the timeline keyframe panel, each row represents one animated property. You can:
Add a keyframe row for a property
Insert new keyframes along the row
Move keyframes to change timing
Change interpolation to control motion style
For keyframe concepts and animation examples, see Animation.
Next Steps
After you are comfortable with timeline basics, these sections are the best next reads: